应用平台WEB
/ / 点击 / 阅读耗时 15 分钟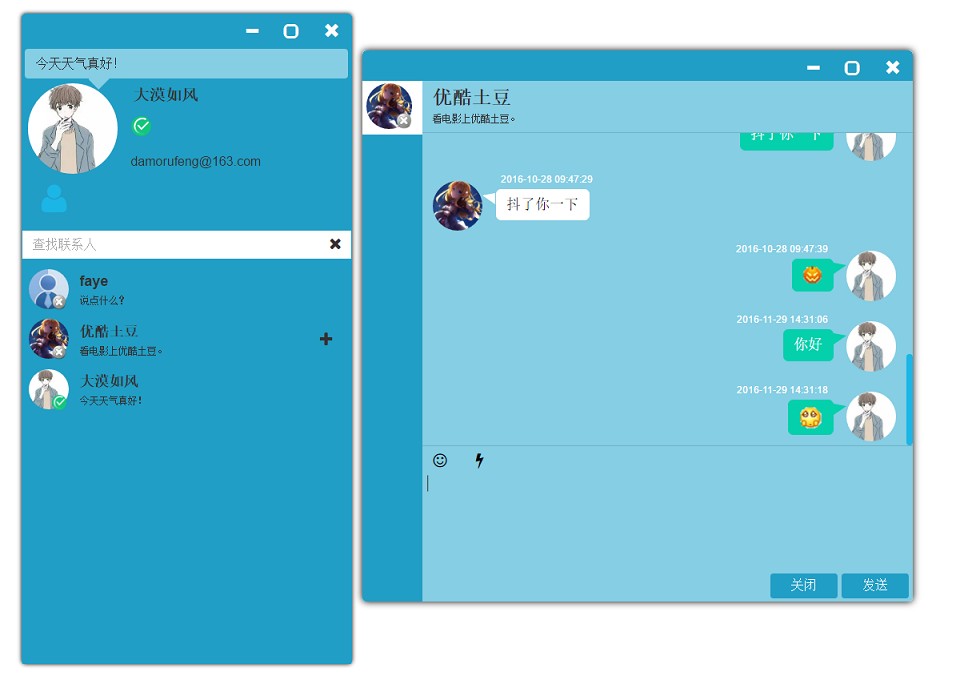
简介
项目涉及技术:RequireJS, Vue.js, NodeJS, Express, MongoDB, Bootstrap, WebSocket, JQuery, ES2015。
应用平台WEB版,是为了做一个网页版的APP store,也就是可以扩展出其他应用的一个平台。目前平台除了搭建了基本的结构之外,还做了一个简单的一对一聊天应用和简单的博客系统。下面将进行简单的介绍,源代码可在demo大师上下载:源码,github点赞。
图文介绍
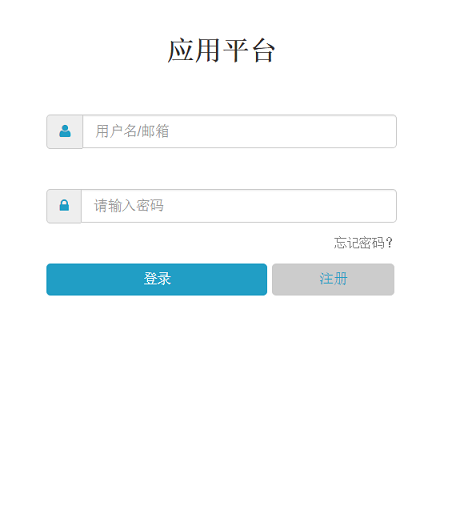
这是登录页面,可以使用用户名和验证了的邮箱登录。
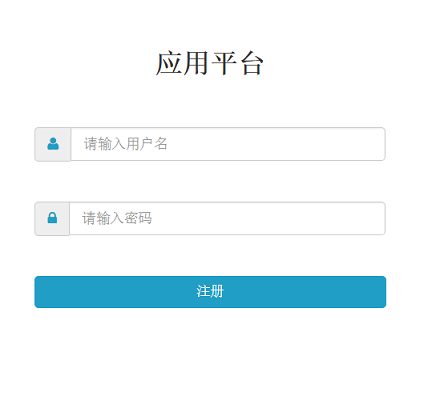
这是注册页面,很简单的注册一下。
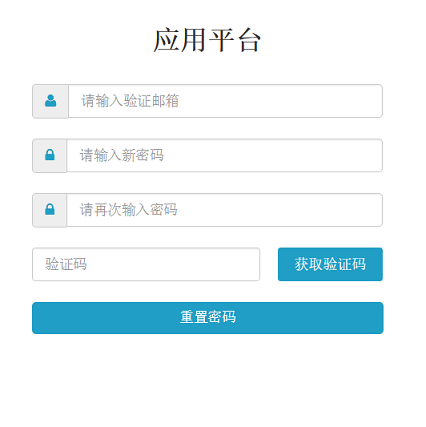
这是重置密码页面,需要通过验证邮箱的随机码,来实现重置密码。主要是通过后台服务器向邮箱发送信息。
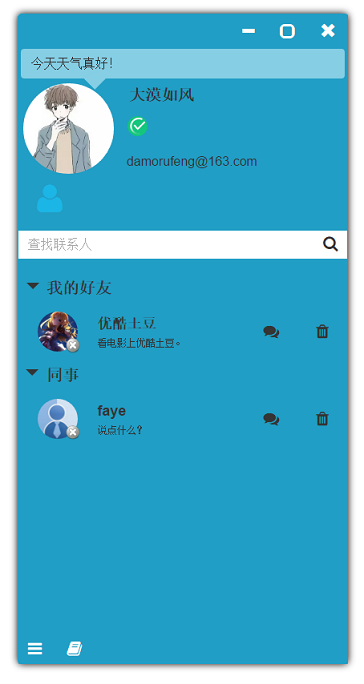
这是主模块,包含登录用户的信息显示,并且可以随意设置。可以修改头像,设置状态,还可以添加邮箱,设置是否有消息提示音和提示框。还有就是显示自己的好友分组信息。可以任意修改分组。
图的右边就是聊天的窗口,可以同时和多个人聊天,都会列在左边,点击就能切换聊天对象。窗口可以通过关闭所有聊天对象来关闭,或者通过右上角关闭按钮关闭。消息中可以发送一些表情。可以发送抖动窗口的消息。
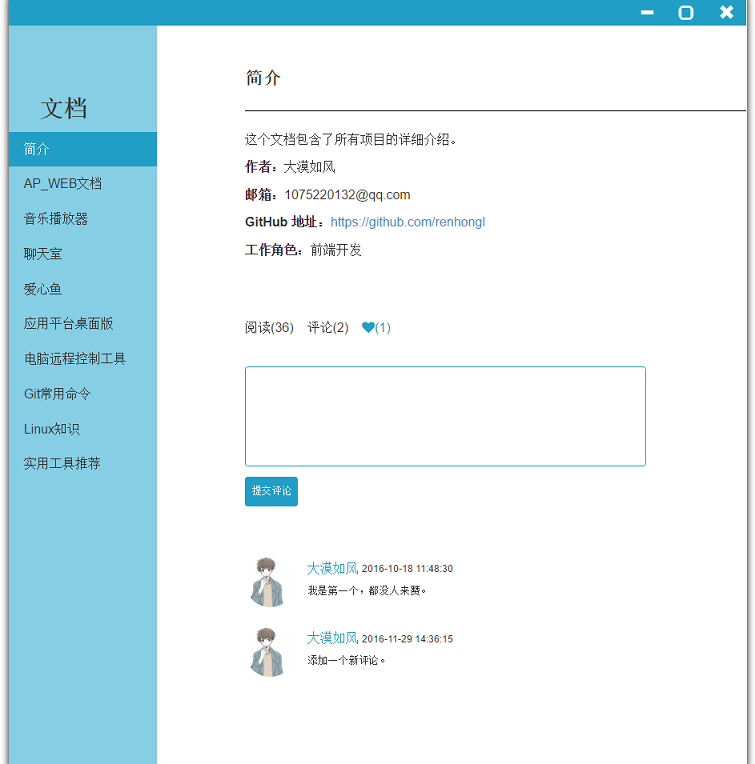
这个应用是聊天主页的按钮点击出来的,可以显示一些简单的文档,并且可以点击喜欢某个文档,以及添加简单的评论信息。
后端部分代码介绍
Email.js
用于发送邮件
1 | ; |
Server.js
作为服务器,并且是Websocket的父类。
1 | ; |
User.js
和用户相关的所有接口都在这里。下面是一个获取验证码的接口,在获取请求后,会随机生成五位数验证码,发送到用户的邮箱中,并且在生成验证码的同时,会调用删除验证码的方法,在一定时间内将此验证码删除,那么用户就不能再使用此验证码修改密码了。
1 | _getCode(){ |
前端部分代码介绍
前端模块化采用的是RequireJS,AP_WEB2.0会使用Webpack,那时候会使用ES2015的模块管理。前端的代码较多,这里主要介绍下自己写的特别的功能。QueryString.js用户获取url上的参数信息。
1 | define([], function() { |
Draggable.js
用于添加拖动功能,在创建时,传入需要拖动的元素,这个元素就能拖动了。
1 | define([], function() { |
Rain.js
用于添加鼠标点击效果,创建之后,在整个网页中,除了class中有button的元素,其他都会在点击时,出现像雨滴落在地上的效果。
1 | define([], function() { |
Message.js
最后一个要介绍的是Message.js,它是一个全局提示的工具,项目中使用它做ajax返回信息的控制,做聊天室消息预览等。当有一些信息要发送给用户时,会在浏览器的右上角出现对话框,包含信息标题,信息内容等。并且分为几种类型的提示,不同类型会有不同主题的对话框出现。由于代码太多,这里只列出了它的构造方法。
1 | constructor(type, content) { |
总结
写代码很重要,调试也很重要,好的调试方法,可以更快的发现、解决问题。正视错误,用积极的态度去处理错误,会提升自己面临问题时的处理能力。